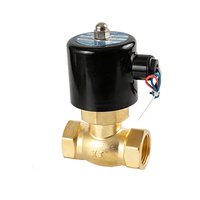
The Fountain Solenoid Valve converts the electrical signal from the ignition key into a high voltage signal to start the starter motor. The Fountain Solenoid Valve of Solenoid Valve Factory is used as a powerful relay switch and used as the initial starting device for the vehicle. The solenoid can transmit up to 200 amperes of current and must be turned on and off every time the vehicle is started. Sometimes, the high-voltage contacts inside the solenoid will burn, deposit carbon, or stick, causing it to fail to start. It is not always necessary to replace the starter solenoid with a new starter. Solenoids, like any other components, are easy to repair, which can save costs.
step 1
Put the vehicle in neutral or park under the emergency brake set. Lift the hood and disconnect the negative terminal of the battery. Raise the vehicle with floor jacks high enough to place two jack supports under the frame near each wheel. Refer to the user manual for the correct steps to remove the launcher.
Step 2
Slide under the vehicle and remove the main starter wire and the two (or three) ignition wires on the back of the solenoid. Make sure you know the correct location of the wires to be reinstalled.
Step 3
Use a suitable sleeve to remove the large starter mounting bolts (use sleeve extensions for hard-to-reach bolts). Twist and turn the starter away from the mount until it comes out. Place the starter in a vise and gently clamp the housing.
Step 4
Remove the thick wire connecting the solenoid terminal to the starter. Use a Phillips screwdriver to remove the backing plate on the solenoid (the bolts on some backing plates may be small).
Step 5
Pull out the small round plunger, paying attention to the spring and the small ball at the end. Keep the spring and ball, and remember how it is installed on the plunger. Remove the two studs on the outside of the solenoid housing. These studs hold the two copper contacts in place. Remove the old copper contacts.
Step 6
Put the new copper contacts (kit parts) into its base, and then reinsert the studs in their positions. Tighten the two stud bolts. Remove the old spring and ball, and install (load) it on the new plunger provided in the kit. Push the plunger back into the solenoid valve and maintain the tension on the spring.
Step 7
Place the electromagnetic plate on the plate, making sure that the spring and ball are aligned with the plate seat. Use a screwdriver or a small sleeve to re-attach the plate to the solenoid.
Step 8
Reconnect the thick starter wire to the solenoid valve and tighten it. Slide back under the vehicle and aim the starter at its mounting surface. Replace the mounting bolts and tighten them with the sleeve and extension.
Step 9
Reconnect the ignition wire and the main starter wire to the post and tighten them. Replace all removed splash guards, beams, or suspension parts to service the starter.
Lift the vehicle and remove the jack bracket. Reconnect the negative terminal of the battery. Start the vehicle several times to make sure that the solenoid is in contact each time.